
In this simple guide, we show you how to transfer music from a computer to an iPhone. Your playlist, your MP3s, your favorite songs matter, so let’s keep them with you no matter where you go.
Consider this scenario: Your CD collection is a major dust collector and needs to go. Perhaps you already copied that music onto your Windows 10 PC or MacBook and have long lost the discs. Now you want those tunes on your Apple devices. You can, and we’ll now show you how to transfer music from a computer to an iPhone.
With this guide, we focus on music ripped from audio CDs, and tunes purchased and downloaded through third-party platforms. Obviously, iTunes serves as the “native” transfer tool, as moving tunes between a computer and an iPhone can be a real pain without Apple’s software. Even more, proper playback requires a third-party app with a built-in music player given Apple’s native Music app won’t discover your downloaded songs.
First, let’s start with importing songs using iTunes.
Table of Contents
iTunes (Windows 10, MacOS)
When connecting the iPhone to a PC with Windows 10 or MacOS, you’ll need to select Allow on the iPhone when prompted with the Allow this device to access photos and videos pop-up window. If you’re connecting the iPhone to a computer for the first time, the PC may reboot after installing new drivers to support the device. That’s not a problem, just another step.
Once a Windows 10 PC reboots, the iPhone should appear on the My PC panel in File Explorer. You can access pictures stored on the phone, but you absolutely cannot create folders or drag and drop files onto the device presumably due to Apple security.
The following instructions are based on the Windows 10 app – not the desktop software – but they also apply to MacOS. We disabled automatic synchronization, but you may also want to toggle off Apple’s iCloud Music Library feature, as it may cause issues and confusion we’ll cover later.
1. For Windows 10, install the iTunes app from the Microsoft Store. (Avoid the desktop version provided on Apple’s website.)
2. You may need to authorize your computer in iTunes. We have a separate guide here.
3. Connect your iPhone to the PC.
4. Open iTunes.
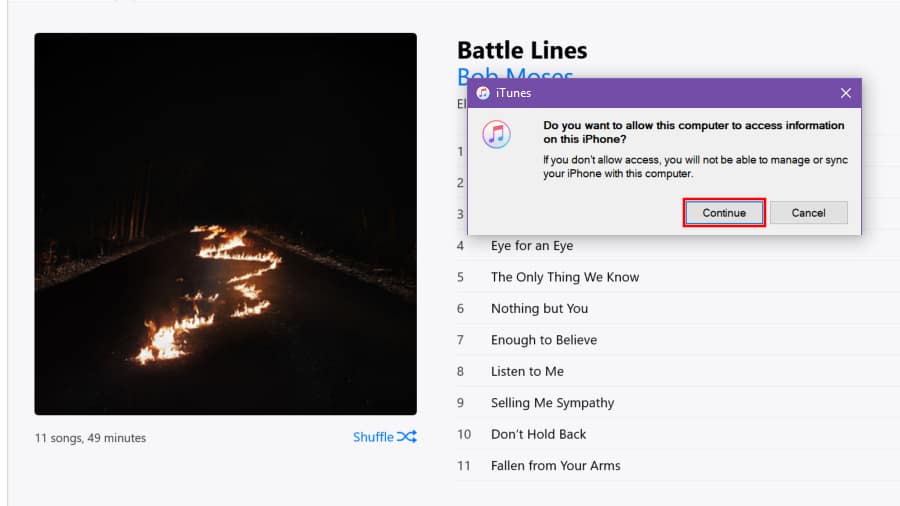
5. Click Continue in the pop-up window asking Do you want to allow this computer to access information on this iPhone?
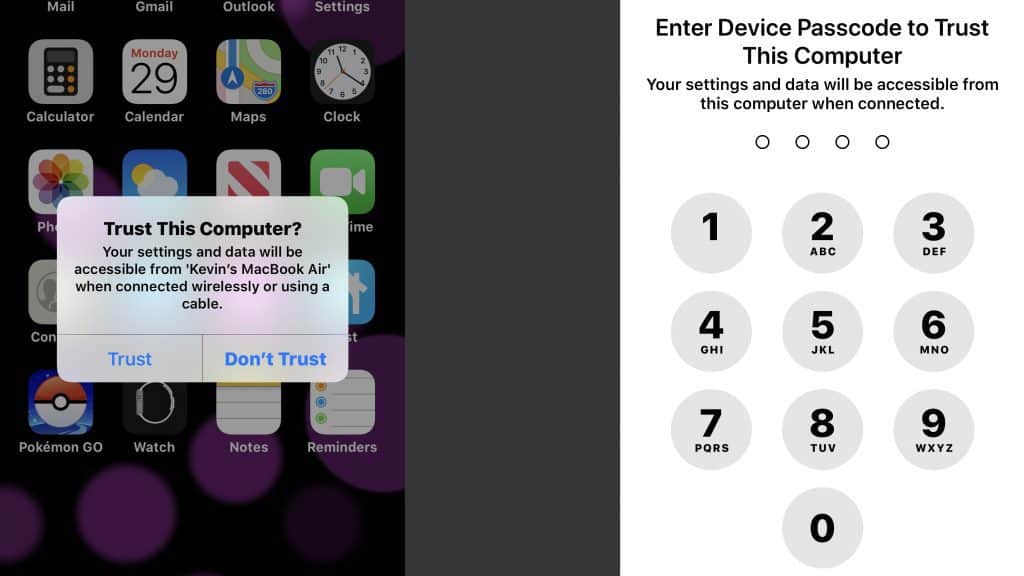
6. On the phone, tap Trust in the pop-up window asking Trust this computer?
7. Enter your device passcode to trust the computer.
8. Click the phone icon in iTunes.
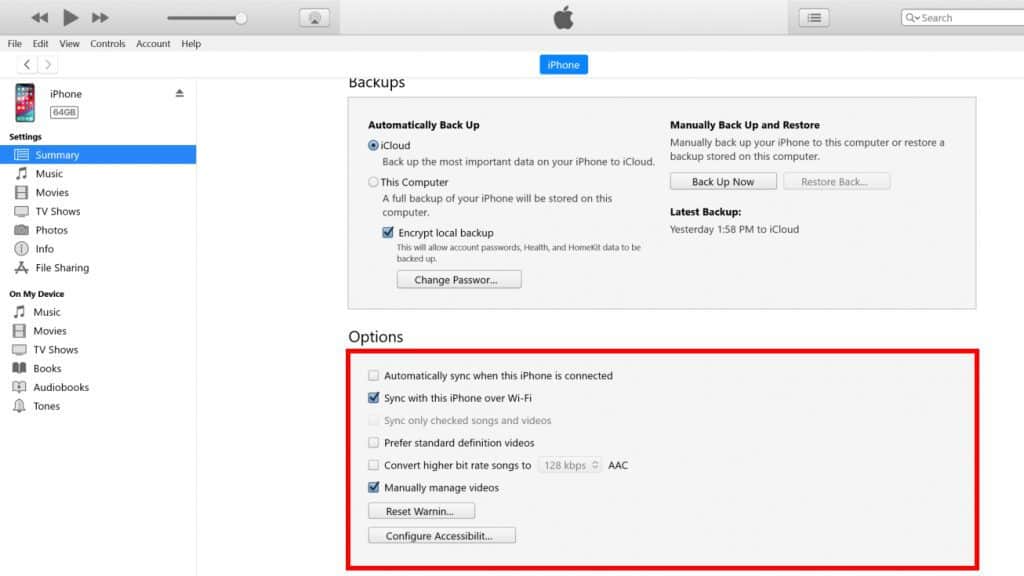
9. Click the Summary listing on the left menu and scroll down to the Options section on the right.
10. Uncheck Automatically sync when this iPhone is connected if you want to manually manage your media. This setting is checked by default.
11. Select Music on the Settings panel on the left.
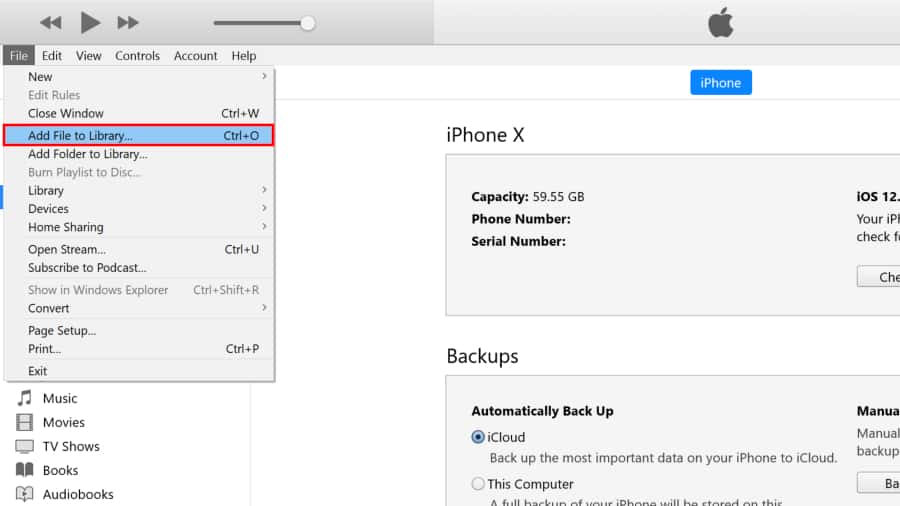
12. Select File at the top and then Add File to Library. If you’re moving a folder, use the Add Folder to Library option instead.
13. Locate your music stored on the PC.
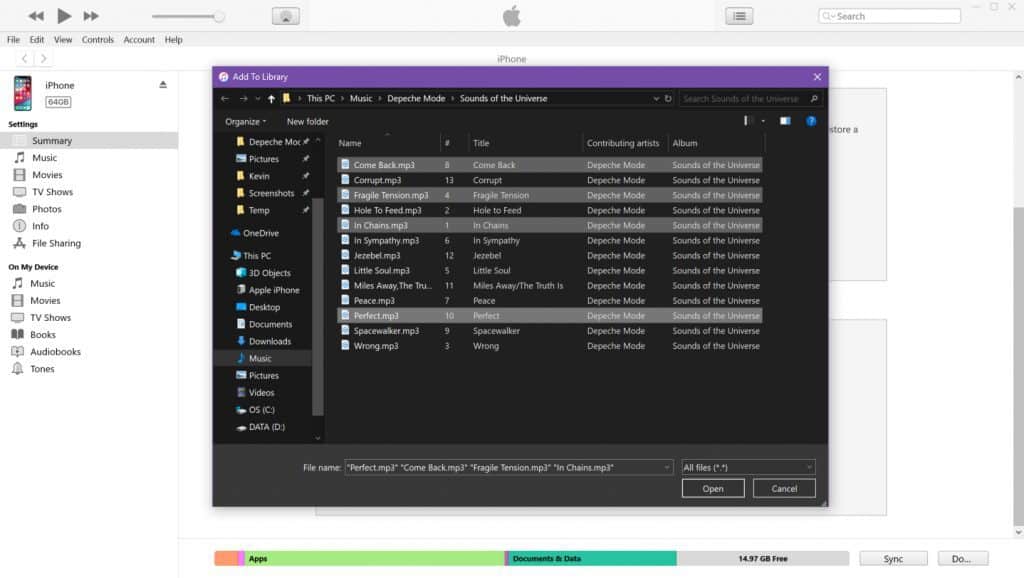
14a. If you’re moving specific songs, hold the Control key, select all files you want moved to the iPhone and then click Open.
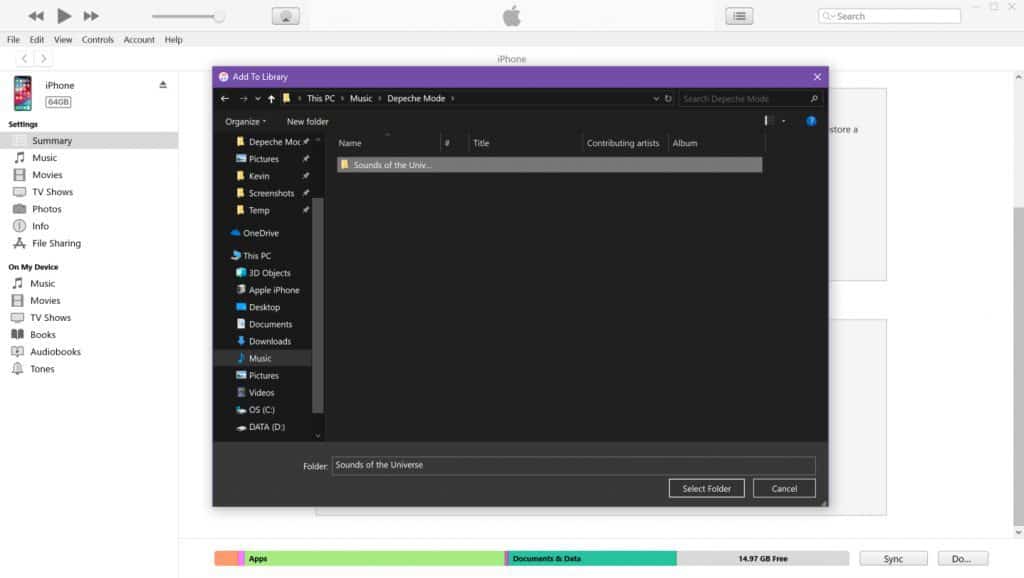
14b. If you’re moving an entire folder, select the folder you want to move and click Select folder.

15. On the bottom right corner in iTunes, click the Sync button.
16. Once iTunes throws your music onto the iPhone, click the Done button.
If successful, you should see the transferred music listed in iTunes on the Recently Added panel in your Library. The music will also show up under Devices > iPhone > Music in iTunes and within the iPhone’s Music app.
iCloud Music Library woes
Apple’s iCloud Music Library feature may cause unwanted trouble. While enabled, music supposedly transferred to your iPhone may not appear on the device. In iTunes, transferred music may not appear on the Recently Added panel nor will you see options to sync music from the Settings > Music panel. All you can do is sync voice memos.
Here’s what we did to “fix” the issue:
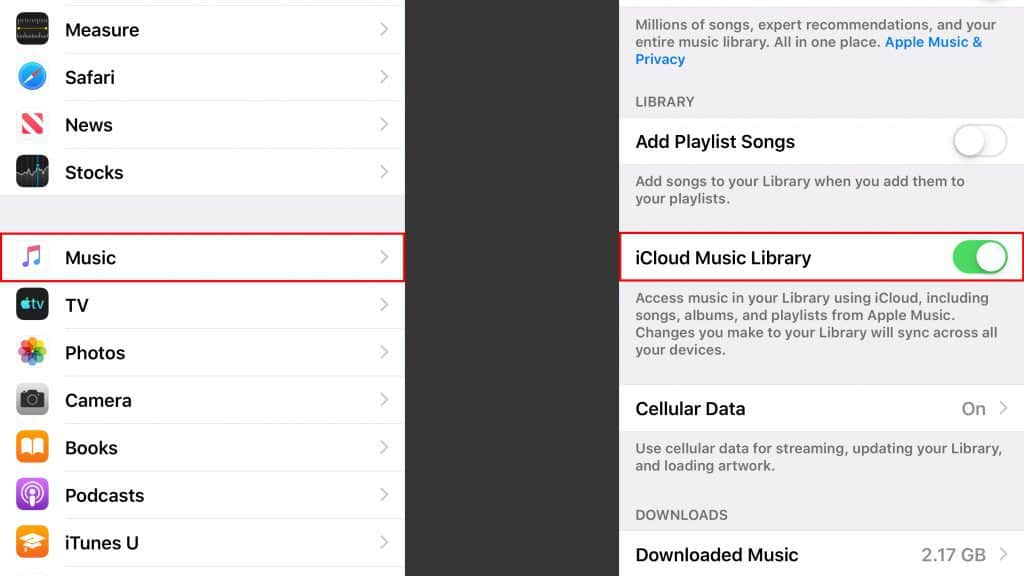
1. On the iPhone, open the Settings app.
2. Scroll down and tap Music.
3. Toggle off iCloud Music Library.
4. Close the Settings app.
5. Reboot the iPhone.
6. Once the iPhone reboots, go back to Settings > Music and re-enable iCloud Music Library (make green).
What happened? iCloud Music successfully transferred your music to Apple’s cloud, but a glitch didn’t confirm the move. Even more, your music won’t transfer to the iPhone until you download the files from Apple’s cloud. At this point, using an actual cloud service like Dropbox would be easier and faster.
In summary:
- iCloud Music Library turned on: The iTunes Settings > Music panel reads iCloud Music Library is On. Your only visible options is to sync voice memos between the PC and iPhone. You’ll need to temporarily switch off this feature to import music directly to your iPhone.
- iCloud Music Library turned off: The iTunes Settings > Music panel reads Sync Music. You’ll see options to sync your entire music library or only specific playlists, artists, albums, and genres. You’ll also see options to sync videos and voice memos.
Use a cloud service
Another good way to transfer music is to send your files to the cloud, through a cloud service like Dropbox, OneDrive, and Play Music. You don’t need software installed on your Windows 10 PC or MacBook. Instead, all that’s required is a desktop web browser and an iPhone app to connect, plus the right logins. And, perhaps, money to pay for this convenience.
While there are free aspects to these services, downloading files for “offline” use could require a monthly or yearly subscription. We provide instructions for the three services listed above. Unfortunately, Amazon discontinued music uploads at the end of 2017 and another service, Box, isn’t designed for music storage and downloads.
Read also: How to Delete Apps on iPhone
Google Play (Windows 10, MacOS, Chrome OS)
With this service, you can upload up to 50,000 songs at 300MB each. There’s no fee for “offline” listening.
1. Make sure Chrome is current. Click the three-dot icon in the top right corner, select Help and then About Google Chrome. Restart the browser if needed.
2. Navigate to the Google Play Music web player here.
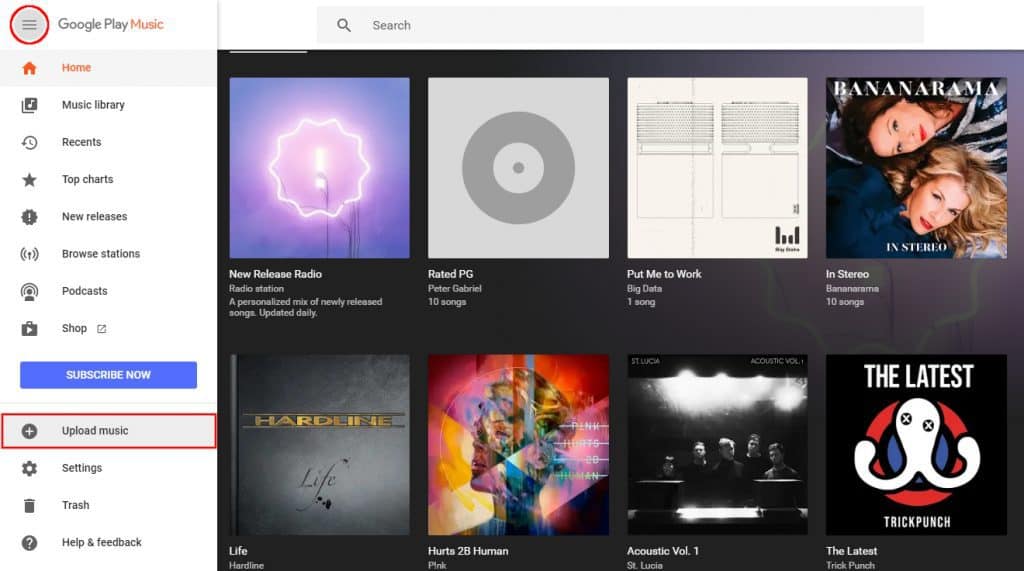
3. Click the three-bar icon in the top left corner.
4. In the roll-out menu, select Upload music.
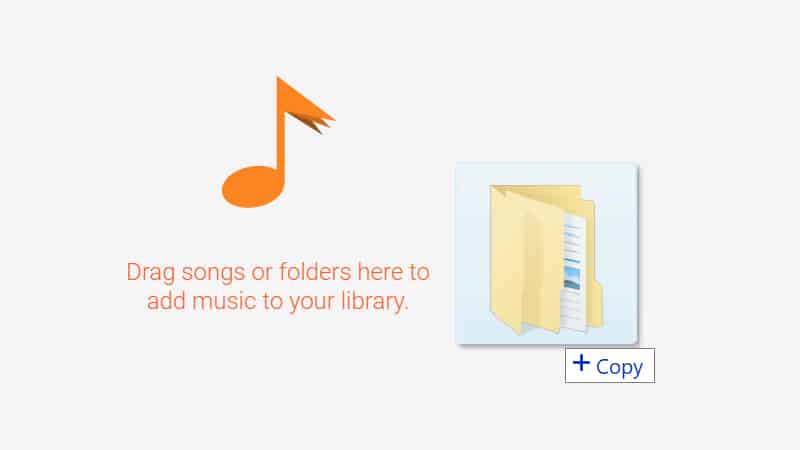
5a. Drag and drop folders and individual songs from File Explorer (Windows 10), Finder (MacOS), or Files (Chrome OS) into the browser window.
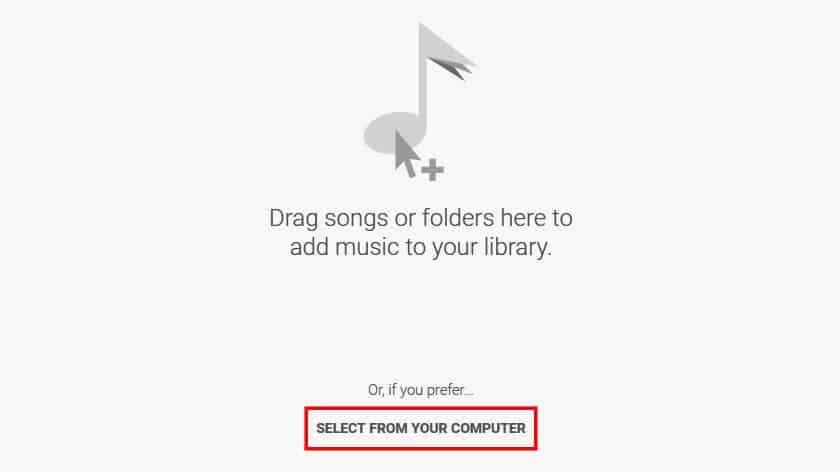
5b. Another method is to click the Select from your computer button and choose the music you want to upload.
6. You can view the upload progress at the bottom of the screen.
7. Install the Play Music app on your iPhone.
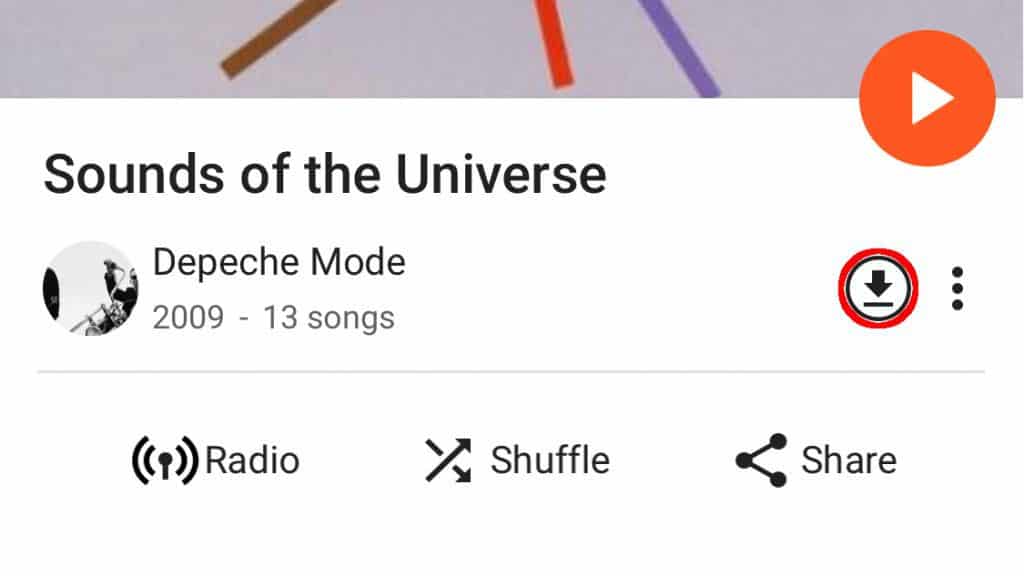
8. Locate the music you uploaded to the cloud and tap the download icon.
Dropbox / OneDrive
With Dropbox, the “Plus” plan costs $10 per month or $99 per year for 1TB of cloud storage. The Pro plan is a higher $20 per month or $199 per year providing 2TB of cloud storage.
Meanwhile, the Personal plan for Office 365 which includes OneDrive costs $7 per month or $70 per year for 1TB of storage. The Office 365 Home plan costs $10 per month or $100 per year and supports six users with 1TB of storage each. Both plans provide full access to Word, PowerPoint, Excel, and Outlook.
1. Open a browser and navigate to DropBox or OneDrive.
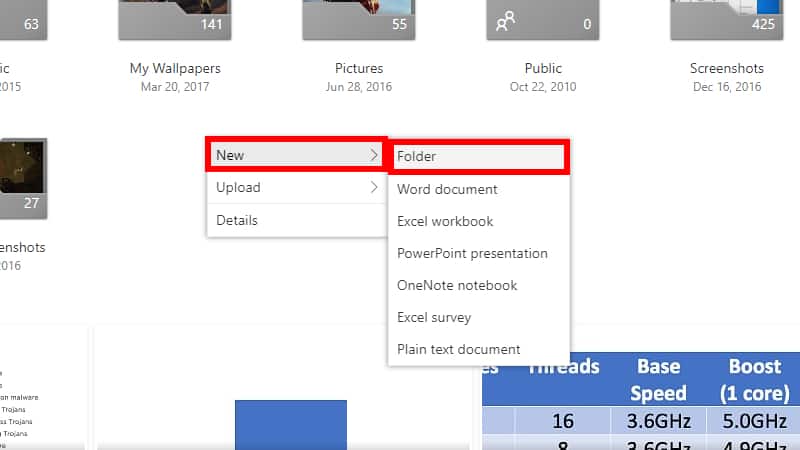
2. Optional: Create a folder called Music.
3. Locate the music stored on your PC using File Explorer (Windows 10), Finder (MacOS), or Files (Chrome OS).
4. Drag and drop the music into the browser window.
5. Install the DropBox or OneDrive app on your iPhone and log in.
6. After your music uploads, you can download the files to your iPhone, but only with an active subscription.
Here’s where playback gets hairy. The ideal scenario is having music stored on your iPhone so you can listen to albums and playlists from start to finish. With Dropbox and OneDrive, you can only listen to one song at a time because these apps don’t have a full media player.
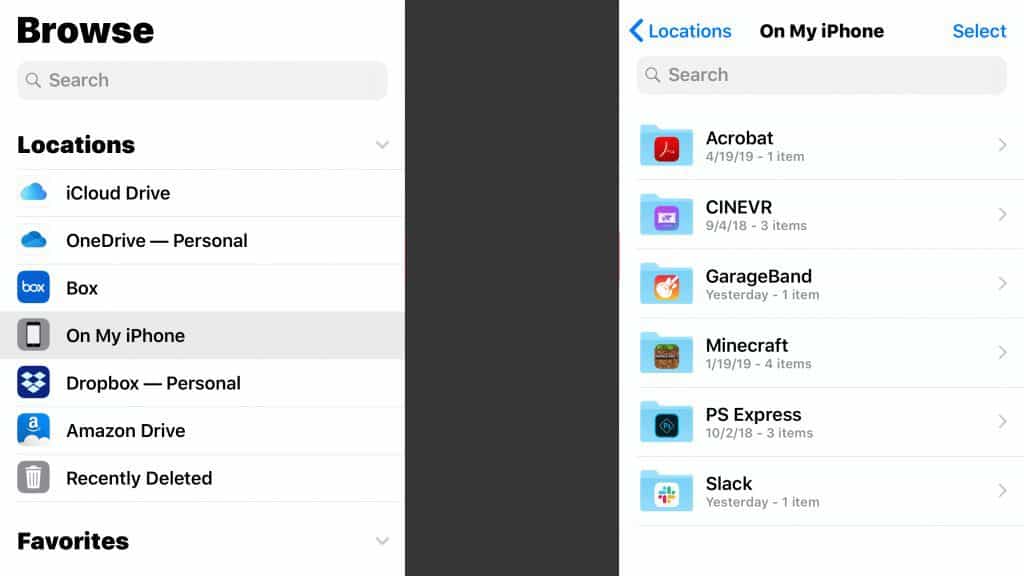
Another deterrent is how the iPhone handles folder creation. The native Files app contains “locations” linked to OneDrive, Amazon Drive, DropBox, iCloud Drive, and other services. It also contains a location labeled On My iPhone, which is where you want to store music.
Unfortunately, you can’t manually create a new folder in the primary On My iPhone location. Instead, you can create a new folder within an existing On My iPhone folder created by Adobe Acrobat, Minecraft, GarageBand, and other apps. You also can’t shove music into just any iPhone folder, as music inserted into the Slack folder will load up as a Slack message attachment.
Even if you find a place to store your music locally on an iPhone, you’ll still run into the playback issues with DropBox and OneDrive. The fix is to use a third-party media player app to download your songs from DropBox and OneDrive into a folder and play your albums in their entirety.
The following instructions are based on VLC for Mobile, a free, open-source media player. Since we already have a subscription to OneDrive, we downloaded music using VLC with no issues. Also, by using VLC, we could bypass the DropBox subscription requirement and download our music for free. (The official Dropbox app requires a “Dropbox Plus” subscription.)
VLC for Mobile: solving playback issues with DropBox and OneDrive on iPhone
1. Download and install the VLC for Mobile app.
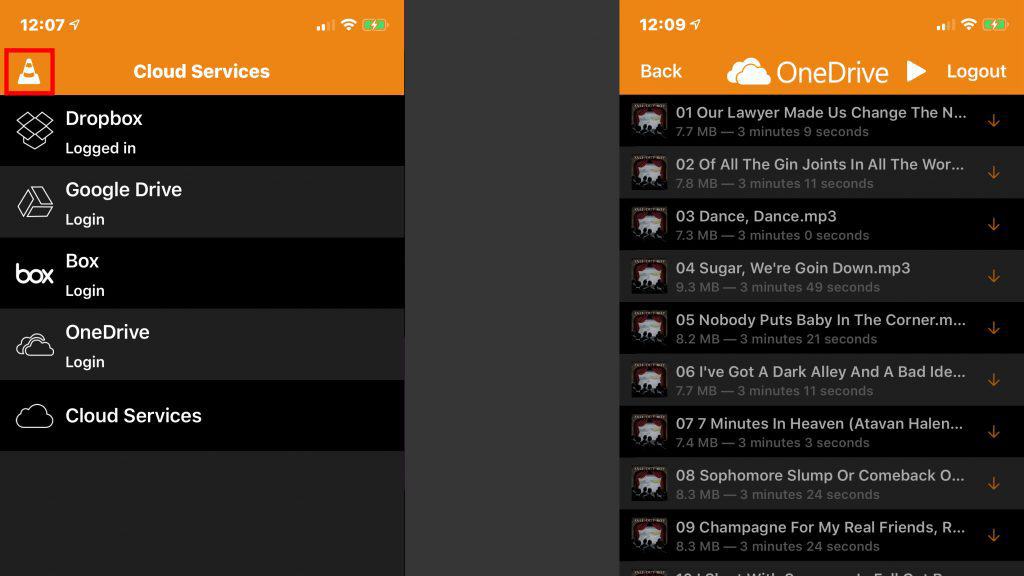
2. Open the app and tap the traffic cone icon in the top left corner.
3. Tap the Cloud Services link on the roll-out panel.
4. Tap the service storing your music and log in.
5. Locate the music you want to download.
6. VLC will not download an entire folder. Instead, you must download songs individually.
7. Once done, go back to the Cloud Services panel and tap the traffic cone icon.
8. Select All Files or Music Albums. Your music is now available directly on the iPhone and you can delete the music from your cloud service.
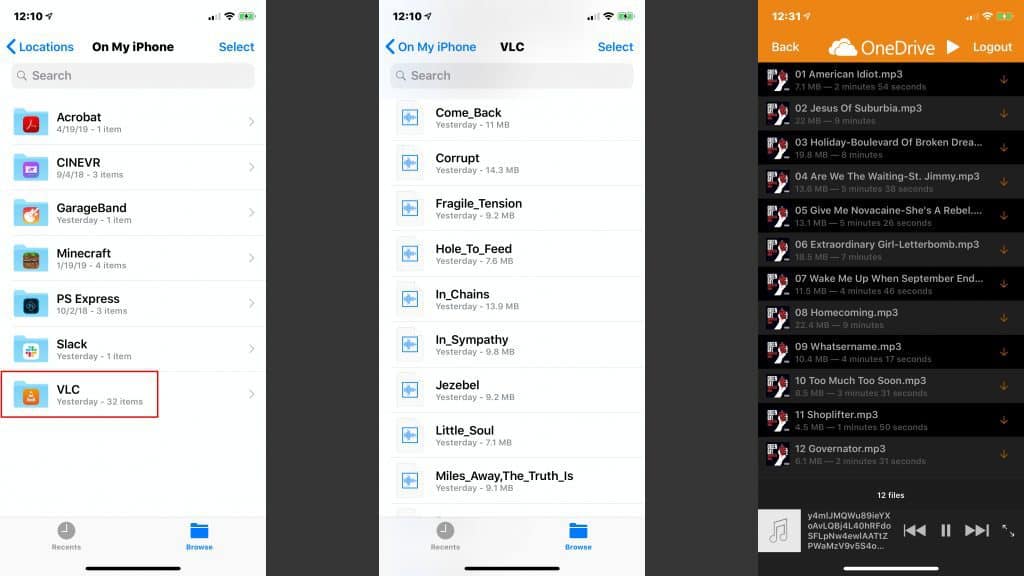
To verify the music is on your iPhone, load up the Files app and you’ll see a VLC folder containing your downloaded music. Even more, VLC has a built-in media player so you can skip ahead or jump back to a previous song.