
If you own an iPhone, iPad, iPod or some other iOS-based device, you will never need to worry about authorizing and de-authorizing your device for iTunes. The authorization/de-authorization process only pertains to computers running MacOS and Windows 10. That said, you can have an unlimited number of iOS devices accessing iTunes and your Apple ID account, but you’re locked to only five computers. Our guide shows you how to authorize a computer on iTunes and de-authorize those you no longer use.
Table of Contents
Windows 10
For starters, Apple provides iTunes two ways for Windows-based devices: The traditional desktop software version in 64-bit and 32-bit formats and as an app through the Microsoft Store. For our guide, we use the Windows 10 app.
Authorize iTunes
- Open iTunes.
- Sign in with your Apple ID (if you’re haven’t already).
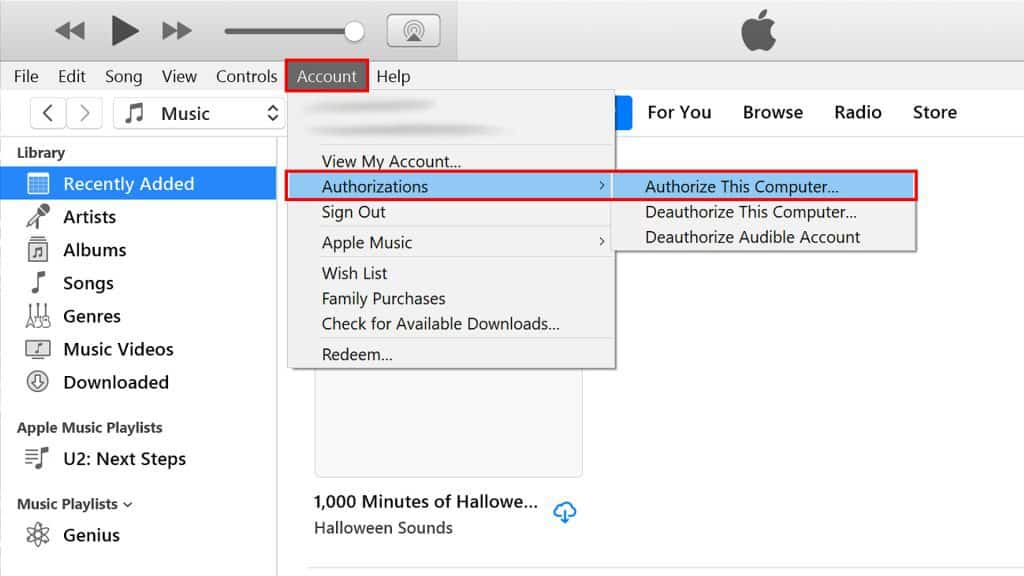
- Navigate to Account on the menu bar at the top of the iTunes window. If it’s not visually available on the desktop edition, type Control + B on your keyboard.
- Select Authorizations.
- Select Authorize This Computer.
- Enter your password, then hit the Enter/Return key or click/tap the Authorize button.
Deauthorize iTunes

- Open iTunes.
- Sign in with your Apple ID (if you’re haven’t already).
- Navigate to Account on the menu bar at the top of the iTunes window. If it’s not visually available on the desktop edition, type Control + B on your keyboard.
- Select Authorizations.
- Select Deauthorize This Computer.
- Enter your password, then hit the Enter/Return key or click/tap the Deauthorize button.
MacOS
Authorize iTunes
- Open iTunes.
- Sign in with your Apple ID (if you’re haven’t already).
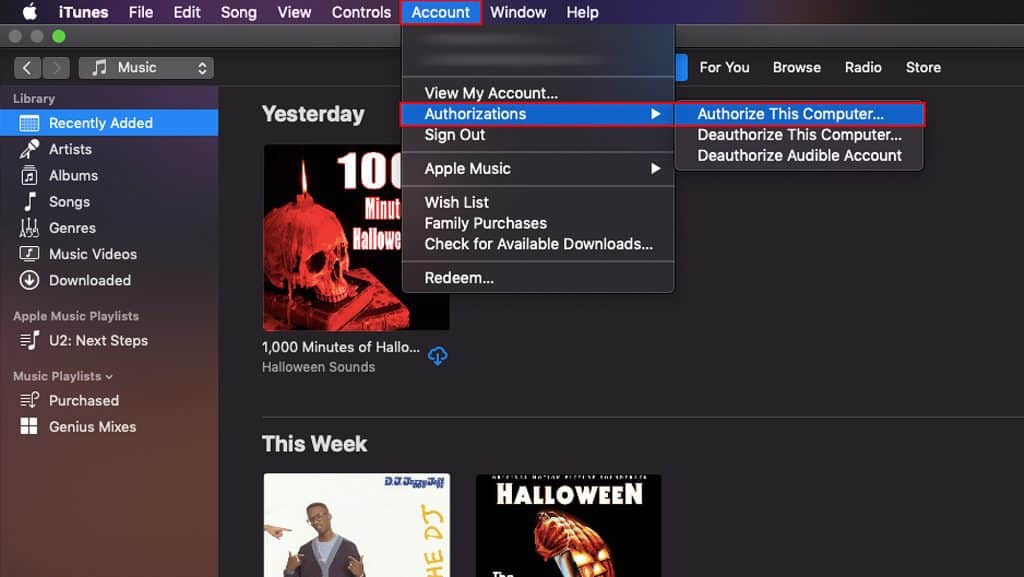
- Navigate to Account on the menu bar at the top of your screen.
- Select Authorizations.
- Select Authorize This Computer.
- Enter your password, then hit the Enter/Return key or click/tap the Authorize button.
Deauthorize iTunes
- Open iTunes.
- Sign in with your Apple ID (if you’re haven’t already).
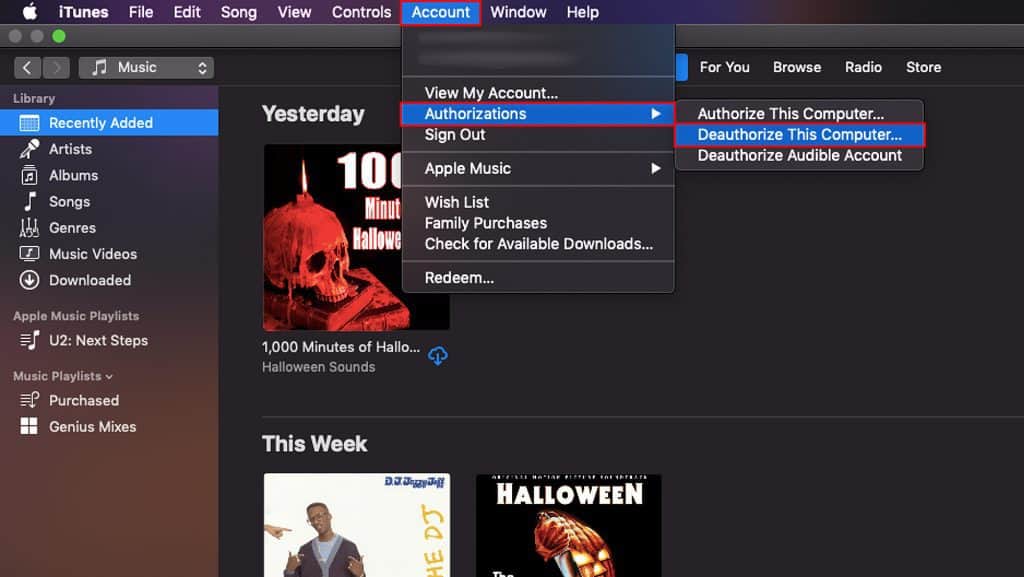
- Navigate to Account on the menu bar at the top of your screen.
- Select Authorizations.
- Select Deauthorize This Computer.
- Enter your password, then hit the Enter/Return key or click/tap the Deauthorize button.
Read also: 5 best music player apps for Mac
Check your list of authorized devices
If you’re trying to authorize a device and it’s rejected, you may have too many devices on your Apple ID’s authorized list. As previously stated, the computer limit is five, so you’ll need to check your list for devices that are authorized but no longer using iTunes, like an old laptop or a fried desktop.
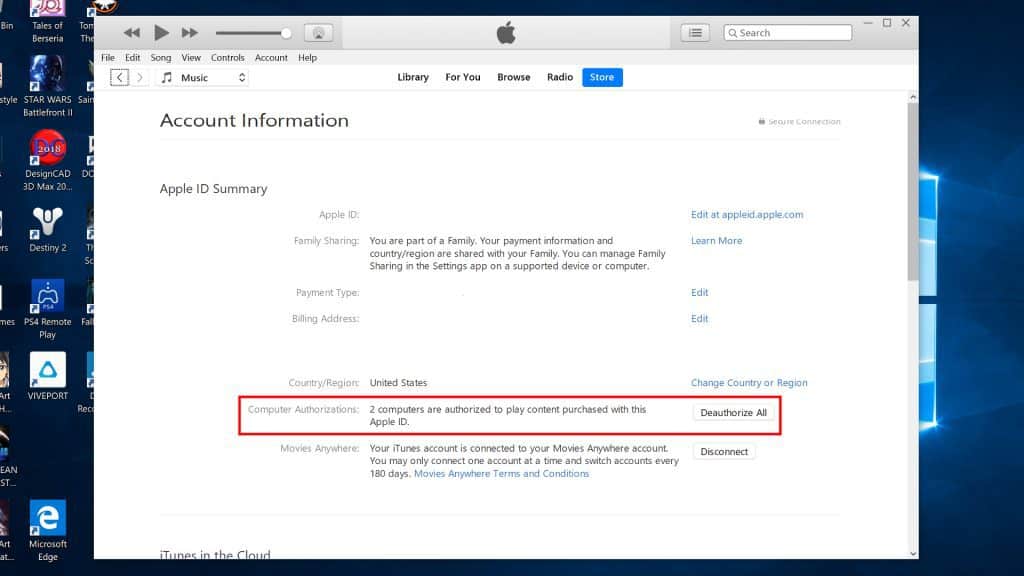
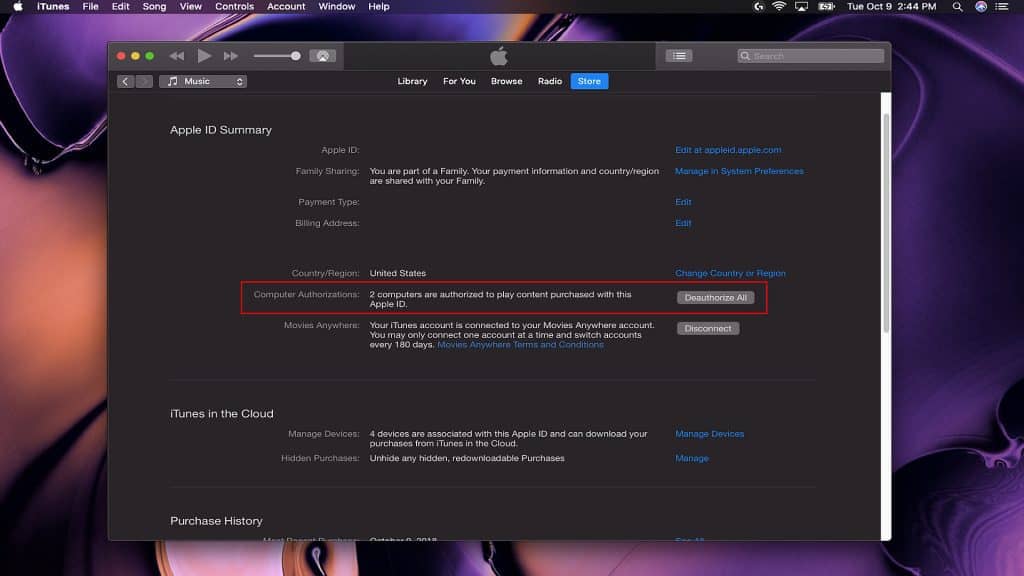
There are two ways to see the number of authorizations you have available. First, the Computer Authorizations section provides an associated number. If you don’t have more than one authorized computer, you won’t see the Computer Authorizations section on your screen.
If you already have five authorized computers, your only option to authorize a new device is to click/tap on the Deauthorize All button and manually authorize each computer you want to access iTunes.
Windows 10 – Computer Authorizations
- Open iTunes.
- Sign in with your Apple ID (if you’re haven’t already).
- Navigate to Account on the menu bar at the top of the iTunes window. If it’s not visually available on the desktop edition, type Control + B on your keyboard.
- Select View My Account.
- Enter your password, then hit the Enter/Return key or click/tap the Sign In button.
- Scroll down to the Apple ID Summary section, as shown above. In our case, we have a Windows 10- and a MacOS-based device authorized to use iTunes.
According to Apple, your Windows 10 PC may be using multiple authorizations if you didn’t de-authorize the device before upgrading the hardware or re-installing Windows 10. To use only one authorization, you will need to de-authorize the PC several times until it’s no longer using an authorization, and then re-authorize the device.
MacOS – Computer Authorizations
- Open iTunes.
- Sign in with your Apple ID (if you’re haven’t already).
- Navigate to Account on the menu bar at the top of your screen.
- Select View My Account.
- Enter your password, then hit the Enter/Return key or click/tap the Sign In button.
- Scroll down to the Apple ID Summary section, as shown above. In our case, we have a Windows 10- and a MacOS-based device authorized to use iTunes.
Now here is a way to see a list of all authorized devices based on Windows 10, MacOS and iOS:
Windows 10 – Manage Devices
- Open iTunes.
- Sign in with your Apple ID (if you’re haven’t already).
- Navigate to Account on the menu bar at the top of the iTunes window. If it’s not visually available on the desktop edition, type Control + B on your keyboard.
- Select View My Account.
- Enter your password, then hit the Enter/Return key or click/tap the Sign In button.
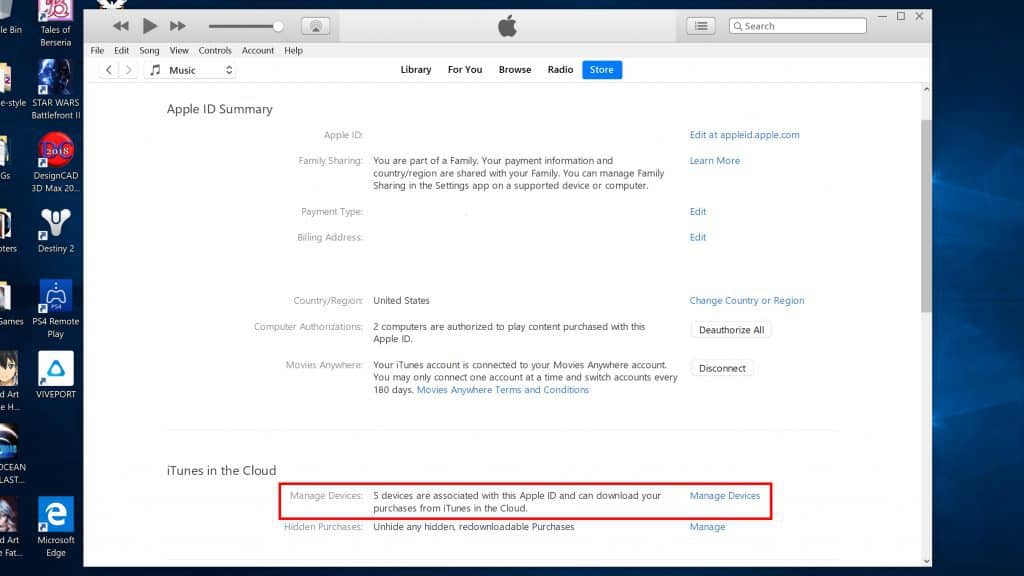
- Scroll down to the iTunes in the Cloud section, as shown above, and click on the Manage Devices link.
- On the next Manage Devices screen, you’ll see all authorized Windows, MacOS and iOS devices.
- De-authorize a device if allowed.
MacOS – Manage Devices
- Open iTunes.
- Sign in with your Apple ID (if you’re haven’t already).
- Navigate to Account on the menu bar at the top of your screen.
- Select View My Account.
- Enter your password, then hit the Enter/Return key or click/tap the Sign In button.
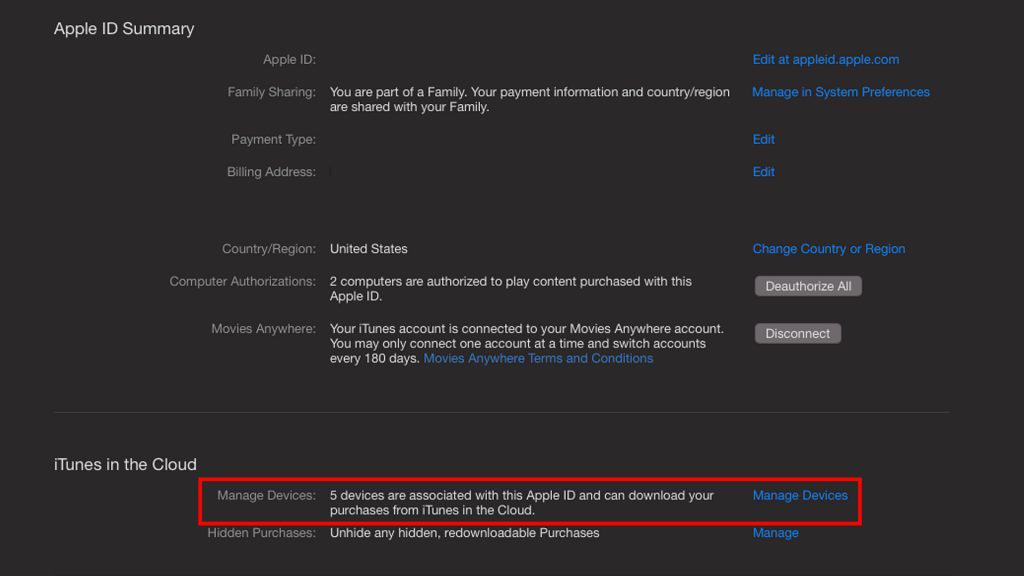
- Scroll down to the iTunes in the Cloud section, as shown above, and click on the Manage Devices link.
- On the next Manage Devices screen, you’ll see all authorized Windows, MacOS and iOS devices.
- De-authorize a device if allowed.