One of the reasons Google Chrome is one of the most used browsers in the world is the ability to extend its native capabilities by adding thousands of extensions that help improve usability, functionality, and productivity.
There are extensions for everything, from productivity tools to aesthetic changes like dark mode extensions.
Extensions work just like programs for computers, but they run entirely in your browser, which means that you don’t need to restart your computer or install any software to make them work and enjoy their functionality.
There are several ways to add an extension in Chrome. You can do it from the Chrome Web Store, or you can install third-party extensions available online. It’s important to note, however, that the latter option comes with a risk, so you should only install extensions from sources that you trust.
How to add an extension in Google Chrome from the Chrome Web Store
1. Go to the Google Chrome Web Store and use the search bar, or the browse by category function to find the extension you want.
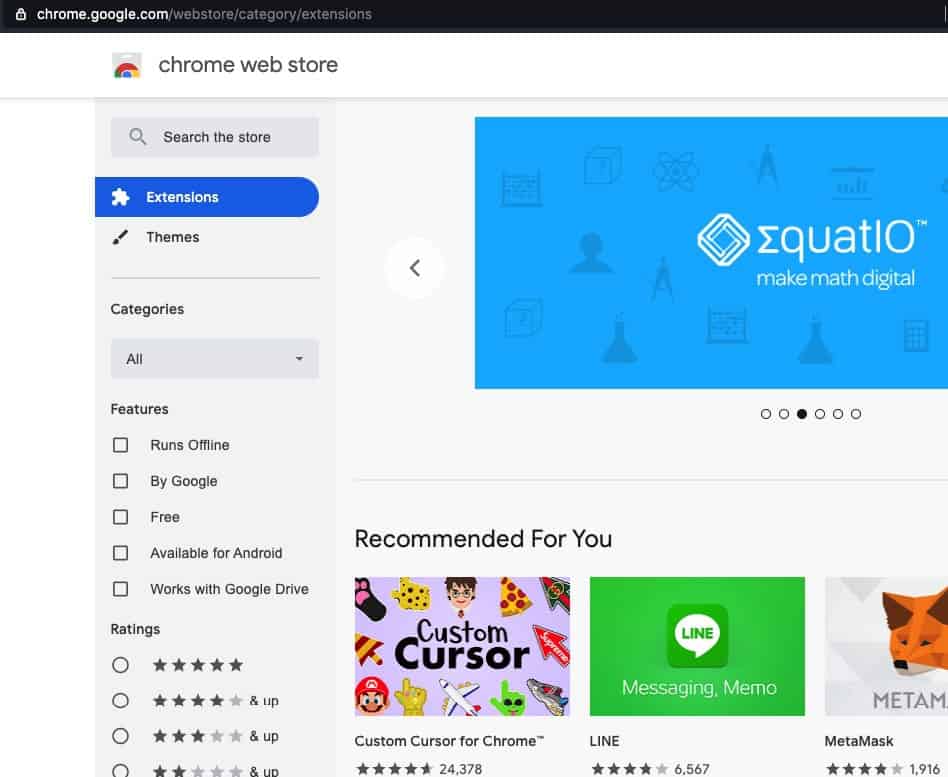
2. Once you have found the extension you want to add, click on its icon and you will be redirected to the download page.
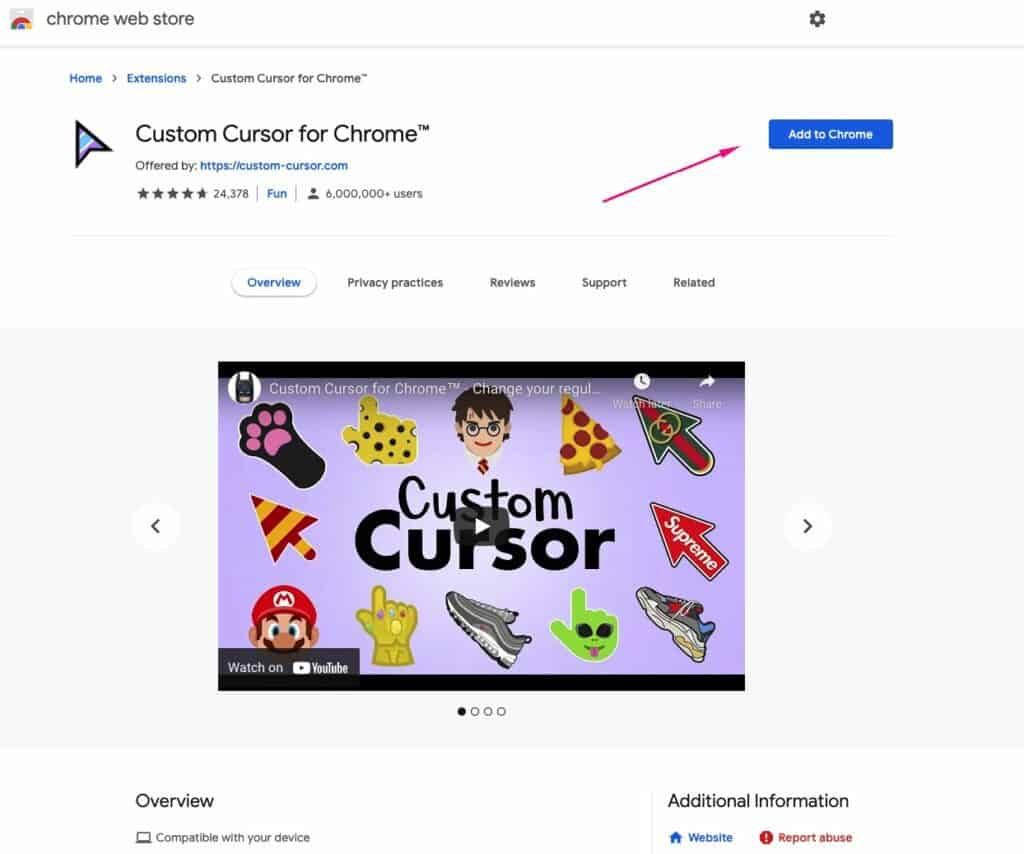
3. Click on the “Add to Chrome” button to add the extension to the browser.
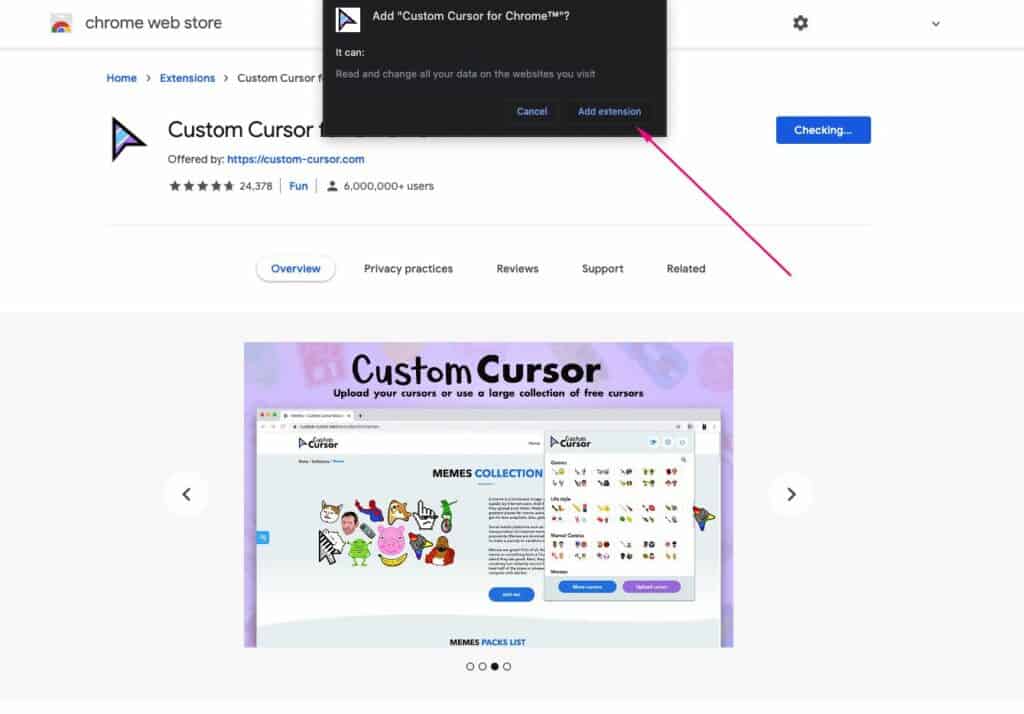
4. When a window pops up to prompt you with permissions, read them carefully and decide whether you want to give the extension access to your computer. If you are happy to do it, click on “Add extension.”
5. When the extension is installed, you will see an icon added to the top right corner of the browser, right next to the settings icon.
See also: How to Screenshot on a Chromebook
How to add an extension in Google Chrome from a third-party source:
Even though Google has restricted the installation of third-party Chrome extensions over the years in order to protect users from malware, there are still ways to install an extension from a different place than the Chrome Web Store.
It’s important to remember that installing any unverified extension from unknown sources should be done at your own risk because it could expose you to malicious code.
If you still want to proceed, here are the necessary steps to install a Chrome extension from a third party.
1. Start by downloading the CRX file of the Chrome extension you wish to install.
2. Next, go to “chrome://extensions/” in your browser and then check the box for “developer mode” that is located in the top right corner.
3. If you don’t already have it, download a CRX Extractor application and install it. Unzip the extension file.
4. Go back to “chrome://extensions/” and click on “Load unpacked extension.” Then, select the unzipped fill. This will be installed on your browser, and you can see the extension in your list of extensions.
How to manage your Chrome extensions?
As you install more and more extensions to your browser, the area next to the settings icon can become cluttered, but the good news is that you can hide the extensions that you don’t need in plain sight.
Here’s how to do it:
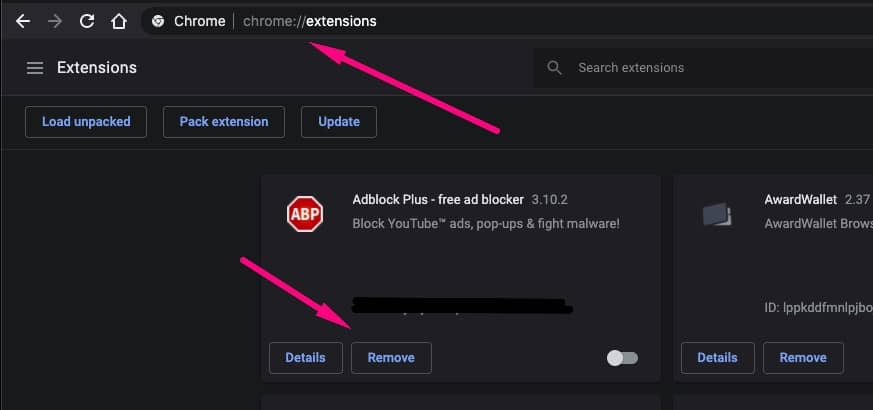
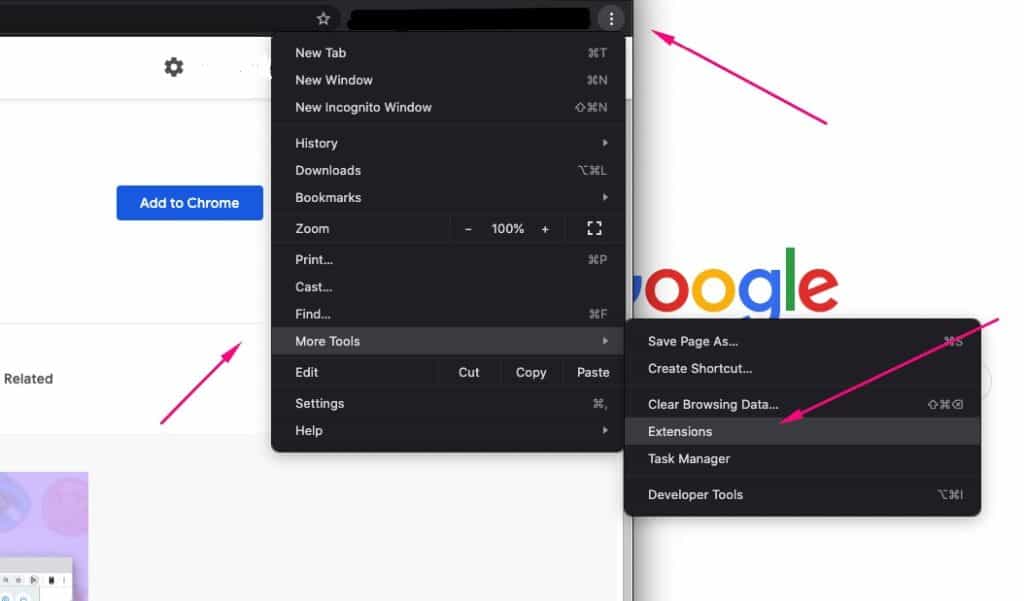
1. Open the extensions page by clicking on the three dots menu icon located at the top right corner of the browser. Navigate to “More Tools,” then click on “Extensions.”
2. Find the extension you want to manage and then click on the “Details” button to see its settings.
3. Turn the extension on or off, access its options, and allow it in Incognito Mode if you want.
4. If you no longer need an extension, you can uninstall it by typing the following address into the address bar:
“chrome://extensions/” and clicking on the “Remove Button.”