If you’ve just got a Chromebook, you may have noticed that your new gadget doesn’t have a dedicated screenshot key. However, this doesn’t mean that you can’t screenshot on a Chromebook.
Instead of having a dedicated screenshot key, the function is built into the Chrome operating system. If you are mostly familiar with Windows laptops, you may think that the absence of a print screen key is not great, but the good news is that the process of taking screenshots on a Chromebook is fairly simple.
There are multiple ways of taking a screenshot on a Chromebook. Some of them are native to the laptop, whereas others require the use of a third-party Chromebook app.
Related: How to use Google Docs: Basic tutorial, plus tips and tricks
Here’s how you can take a screenshot using various methods.
Table of Contents
Native ways to screenshot on a Chromebook
You can choose from multiple ways of taking screenshots natively on a Chromebook. These include using the Show Windows Key, using the Power and Volume Down buttons, or using a stylus pen.
1. Use the Show Windows Key

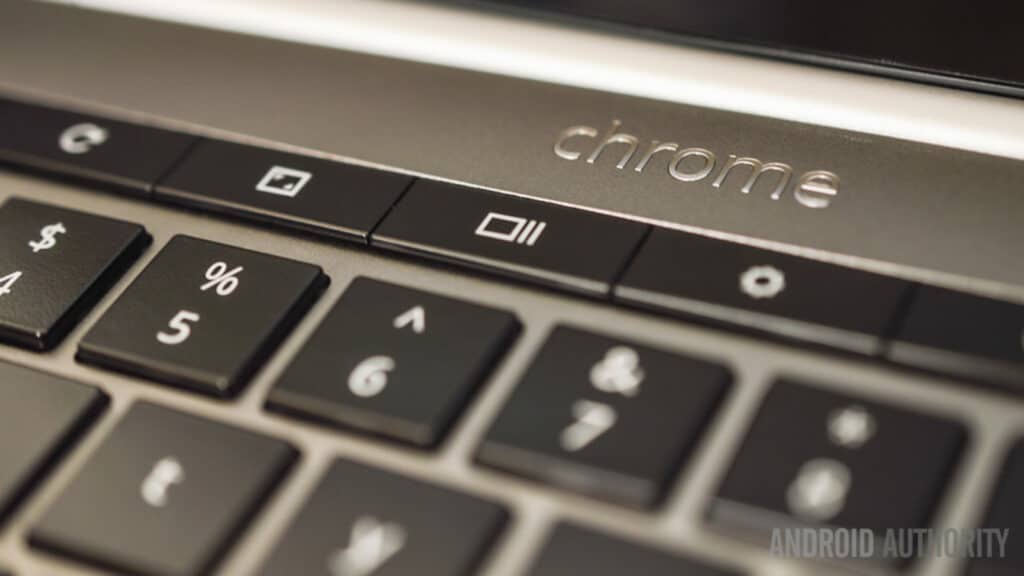
The Show Windows key is the sixth one located just about the number row. It looks like a rectangle followed by two vertical lines and it works with different key combinations to capture various types of screenshots.
Hold down CTRL+Show Windows to capture a full screenshot. You’ll notice a notification window at the bottom right corner of the screen that lets you know the screenshot was saved successfully.
If you want to capture a partial screenshot, press down CTRL+SHIFT+Show Windows at the same time. Your mouse cursor will change to a crosshair icon that you can drag to select the screen area you want to capture. Release the trackpad to capture the screenshot.
2. Use the Power+Volume Down Keys

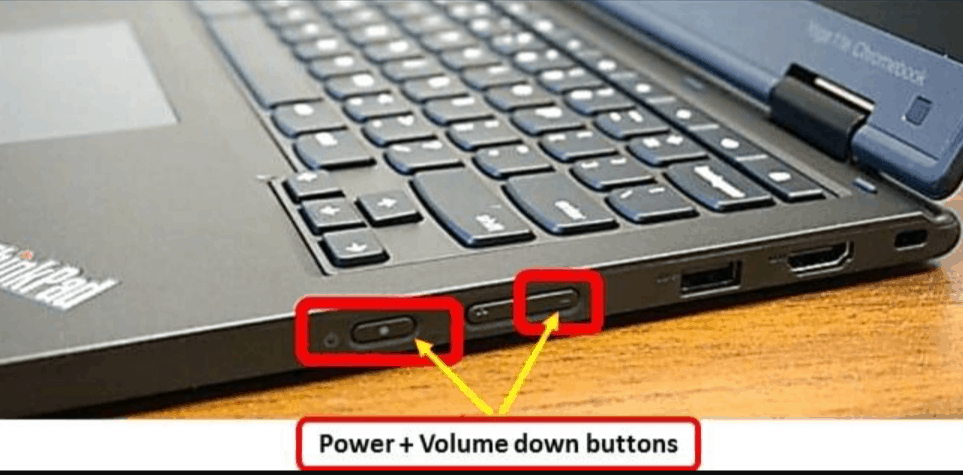
Another easy way to take a screenshot on a Chromebook is by using the Power + Volume Down key combination. If your Chromebook can get into tablet mode, this is the only way to take a screenshot. That’s because your keyboard will be inactive when in tablet mode, so the method above won’t work.
The Power + Volume Down only takes a full screenshot, but if you want a partial one, you can crop the screenshot you’ve just captured. There is no way to capture a partial area of your screen when in tablet mode.
3. Use a stylus

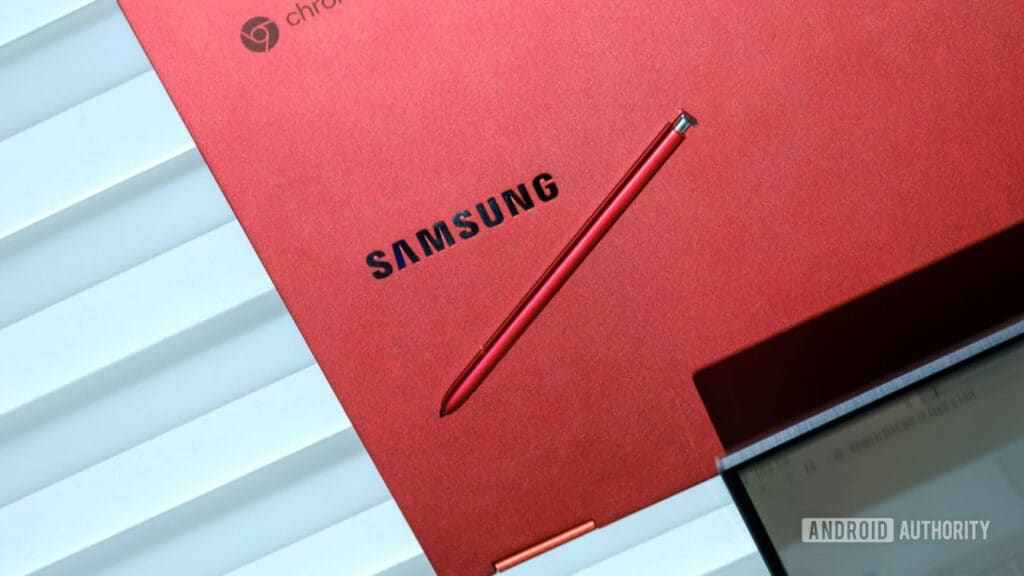
Multiple Chromebooks have stylus support and if you have one of these models, you can take a screenshot with your stylus. Here’s how to do it.
- Tap the Stylus icon in your dock.
- Tap “Screen Capture”.
- Tap the rectangle with a plus symbol.
- Drag a rectangle to select the area of the screen you want to record.
- Tap “Capture”.
Read Also: How to Take a Screenshot on a Windows PC
How to record your screen on a Chromebook?
You can also take a video of your screen instead of a screenshot. Here’s how to do it:
- In the bottom-right corner of the screen, tap the time.


2. Tap “Screen capture”.

3. Tap the camera toggle to take a recording instead of a screenshot.

4. Tap “Settings” and then “Record microphone” if you want to record your microphone as well.
5. Tap the plain rectangle to take a full-screen capture.

6. Tap anywhere on the screen to start recording. The recording will start after a 3-second countdown.

Best apps for taking screenshots on a Chromebook
You can use Chromebook’s built-in image viewer editor if you want to edit your screenshots. If you’re looking for extra functionality, you can use one of the many advanced Chromebook apps to edit your screenshots. Here are some of the best apps for taking screenshots on a Chromebook.
1. Lightshot

Price: Free
This is a free screenshot tool for Chromebook that you may already be familiar with because it’s also available on Windows and Mac. You can download it as an app or a Chrome extension. With Lightshot, you can select any part of the screen to take a screenshot that you can then edit or upload in the cloud. The online editor of this app is quite powerful, allowing you to do lots of edits that aren’t available natively on a Chromebook.
What people think
Most of the reviews for Lightshot are positive, with users liking the ease of use and wide range of editing tools.
What we think
Lightshot is an intuitive and powerful screenshot app for Chromebook that’s perfect for personal and business use.
Score: 9.8/10
Download Lightshot
2. Awesome Screenshot

This snipping tool for Chromebook allows users to record their screen and camera and also add annotations and comments. You can also blur personal information and share your screenshots with one click to various platforms. One of the advantages this tool has over the others on this list is the fact that it connects with Asana, Trello, and Slack for easy collaboration with teammates.
Price: Free
What people think
Reviews for Awesome Screenshot are mostly positive, with users mentioning the tool has lots of intuitive features. Negative reviews typically mention the learning curve and some bugs when trying to capture a selected area.
What we think
Awesome Screenshot is one of the easiest ways to record and share your Chromebook screen with convenient integration with Slack, Trello, Jira, GitHub, and Asana.
Score: 9.6/10
Download Awesome Screenshot
3. Fireshot

This free-to-use extension makes it easy to snip an entire web page or just parts of your screen. The simple and intuitive interface makes capturing screenshots very easy, and you can also edit the screenshots extensively. With this extension, you can save your screenshots to disk as PDF, JPEG, or PNG and you can also send them to Gmail or print with one click.
Price: Free
What people think
Reviews for Fireshot are mostly positive, with users loving how easy it is to capture multi-page web pages as a continuous scrolling PDF. There are also some mentions of bugs and network errors.
What we think
Fireshot is one of the easiest screen capture tools for Chromebook and the capture the entire page feature makes it stand out from the crowd.
Score: 9.3/10
Download Fireshot
FAQ
The default folder where screenshot image files are saved on a Chromebook is the Downloads folder. Here’s where you can find all you are screenshots organized by date and time. If you want to have your screenshots available on Google Drive, you’ll have to move them there manually.
To edit screenshots using the native image viewer, double-click on the screenshot you want to open and click the pen icon located at the lower right side of the window. Once you’re in Edit mode, you see various tools that make it easy to crop, rotate and make other adjustments to your screenshot
